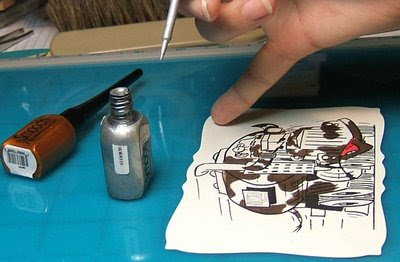
I press it into the center area that I want to color, if the area is a little larger. That gives me a little puddle to work from, and I just push it out to the corners of the area.

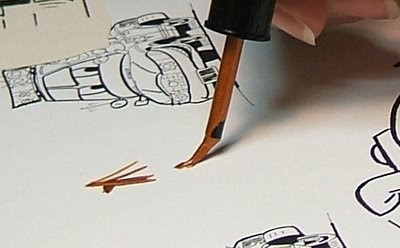
Here you can see the detail you can control with the pen-point tip.
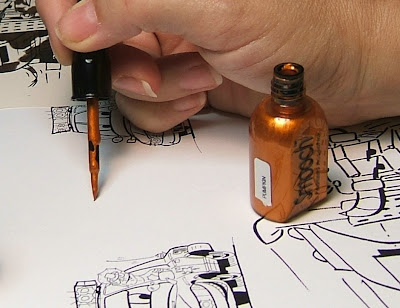
Working back and forth between the bottle, you can draw fine lines, even use it for lettering.

Press it to flex the tip, and it will spring right back for you. If you don't have a really steady hand, you can go back over the area with a slick writer or a bic fine-point permanent pen to cover up little bobbles.
The fine point is perfect for accenting eyes, filling in small dots that you want to draw attention to, and touching up little blemishes.

Lots of people I talked to really weren't looking forward to getting Smooch because Shimmerz and similar products were still relatively new to the market. However, I love the control and opacity of Smooch, plus there are more colors out, including a pink (Taffy) that I know some of you will swoon for. Some of those same peeps did try a bottle or two of Smooch and have mentioned the two products are useful for completely different applications.
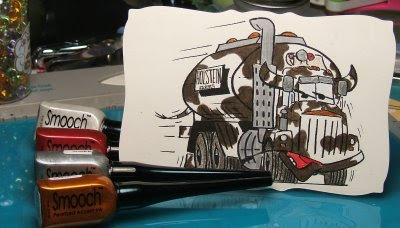
I used 4 colors of smooch on Malcolm - moonlight for the headlights, siren for the roof lights, silver fox for the mirrors and sun visors, and pumpkin for the turn signals and running lights. So, there you have it. A closer look at Smooch. Malcolm says you should try some! Ask your LSS to open a bottle for customers to try. I look forward to your impressions after using the product.

I used 4 colors of smooch on Malcolm - moonlight for the headlights, siren for the roof lights, silver fox for the mirrors and sun visors, and pumpkin for the turn signals and running lights. So, there you have it. A closer look at Smooch. Malcolm says you should try some! Ask your LSS to open a bottle for customers to try. I look forward to your impressions after using the product.
Ta for now, ~ky
I may have to go get me some Smooch!!! Thanks for the tutorial!!!
ReplyDeleteooooooooooo thanks for the tutorial..........now I know what Smooch is!
ReplyDeleteJust terrific Ky. This is coloured exactly the way Robbie imagined it to be coloured when he drew it! Good goin' darlin'!!
ReplyDeleteTerrific tutorial too. Now we know how to use Smooch! I, for one, had no idea.
Hugz
Sunshine & Robbie:)
My comment to you is simple...this...is...FABULOUS! WOWEE! I simply LOVE dat brown on dat cow! I was laughing during the preliminary sketch phase when I was pondering what all you skilled stampers might do with this design. Kinda makes me wonder what you'll do with our soon-to-be-released "Stinky Steve" ... betch can't guess what HE is!!!! ~Rob
ReplyDeleteFirst, your hands are really pretty. Has anyone ever told you that?
ReplyDeleteThanks for the tutorial! I haven't gotten any Smooch yet, but I really want to. Fun image!
Miss you, mean it!
I didn't know what Smooch was. Thanks for the enlightenment.
ReplyDeleteBeverly Bishop
Very cool! May have to invest in some Smooch
ReplyDeleteAwesome job with the cow spots. That smooch stuff looks really cool.
ReplyDeleteKY!!!!! I think it's a perfectly wonderful tutorial!!!!
ReplyDeleteThis is fantastic. Thanks for the tutorial. It is so nice to see how new things work. I let a comment on STV for you. What does LSS mean?
ReplyDeleteI love the top of your page. That is so cute.
Thanks again, Linda