Friday, January 4, 2019

ALAD Day 1

Hey there! Did you miss me? I've sure missed you! I got a new job and it's really hard, physically and mentally. I find myself coming into my studio and looking at all my fun things with no spark to actually make anything. Have you ever had that problem? Just turn out the lights and walk away?

I've tried forcing myself to ink up images. I've made myself color the cutest new releases. Anything forced tends to die a harsh death and art is no exception. I've also felt blocked and wondered why. I decided clutter had part of the blame, and I've been too tired to actually clean enough to have room to work. Walk. Away.

Christmas came and went and I made zero cards. Judging from the cards I received, I think a lot of us were struggling, too. So I think I'm going to try something. I still have this wonderful job, and it still drives 90% of my energy out the door with it. But I don't want my art to be held hostage.

Please join me! I'm hanging out on Splitcoast Stamper's website, hosting the mixed media challenge this week. It's a free site, and it's a fun connection with other crafters. What will we be doing? We'll be creating a project with a minimal time constraints. Each day we'll add a layer to our project. Just a few minutes and you can feel accomplished!

Each day you can check in here, or over on SCS, to see what the next step is. Today, we're prepping our paper, canvas, or tags with gesso (jess-o) and then adding a nice fat layer of crackle paste. Don't have gesso or crackle paste? Prep your page with mod podge, gel medium, or just acrylic paint. You can use white glue and acrylic paint to create cracks on your surface.

I started with a wipe-off page in my Dylusions journal. This was a page with random ink, paint, circles of tissue paper, etc. I covered it with gesso and added texture from my silicon brush.


I added some acrylic paint in circles, then overlay the crackle paste using 2 stencils and just covered the other completely.

These stencils are amazing. Visit A Colorful Life for more!
The reason for the acrylic paint - I wanted the color to show through the cracks. Now, I feel like I'm moving again! I'll set it aside to dry and we'll take the next step tomorrow!

These brushes are what I use for fast application and easy clean up.
This is how thick I lay on the crackle paste to get good, wide cracks.


Thanks for stopping by - if you join in, please use the hashtag #MixALAD19 so I can find you! You can also upload to this thread on SCS-Mix.


And a little bonus, because I had the stuff out. This is the Dylusions dyary and I'm excited to document my working days in this form of a visual record.

Cheers!
~ky

Friday, August 10, 2018

Darling Dahlias

Hello friends! I'm here to share the Hero Arts make and take project given at Junkie Fest. Junkie Fest was a huge hit, and we're already talking about 2019. If you want to stay in touch, please head over the the Stamp Junkies Facebook page and meet some amazing people!

Today my project is all about this little set. When the fest was over, there were some extras in this make and take, so I was given 4 to take home. I decided to share my Copic coloring methods using 4 different color families. I've been a little under the weather, so I did a photo step-out rather than a video.

Hero Arts Dahlia

------    RED     ------


Reds are often hard for people to grasp. In my mind, I break down what colors go into making a red flower. That determines my colorway.


You can see my list of colors - R89, R39, R27, R24, R05, R01, E01, R000. I begin by determining my drop shadows using my darkest color, R89. Drop shadows are the areas that are directly beneath the petal above. Then I add quick flicks of that color into the leaf. Shadows are composed of the deepest color of the flower plus any coolness dependent on the light. I'm staying neutral with these, but you could go warmer or cooler depending on your light type and source.


I chose a warm, brighter color for the next application. Quick flicks again, but I'm staying close to the R89 areas. This pulls a little of the R89 out into the petal, softening the line and brightening things up.


I shift into the lightest color. This helps even everything out and shows me where I have overly or under-saturated points. I start picking up colors with the R01 to add contrast, or let the maker linger to push ink out of the way.

You see my little porcelain dish? I love these. They come in a stack of 5 with a lid. I scribble a little of my darker colors into this dish for tip-to-tip pickup. If I do actual tip-to-tip, I inevitably drop one of the markers splat on my project. When you see the photos in succession, you'll note when those streaks change. A sure sign that I've picked up another color to be the 'tween combo.


My next colors fill in gaps, and the I finally start addressing the center. Some dahlias have vibrant greenish-yellow centers. My red color palette leans towards orange, so I'm adding more orange and yellow bits in there.

The color palette on my paper is not always a complete list. It's my starting point. I realized the E01 wasn't going to fit in, and that I needed those yellows.


I'm bringing in the YR65 to those centers, and little touches on the other petals to carry the orangeness around.


Smoothing with R01.


And finally tightening up the shadows with my next to darkest in this line up, R39.

Still with me? Great!

------      GREEN     ------


I follow the same process with the leaves - determining the shadow areas, and where I want the lightest part of the leaves to fall. If an image has a ridge, it can be lightest (nearest your eyes), or deepest if you want that to bend away from the light.


G99 begins with the outer edges, bending away from the eyes.


YG67 starts to brighten and lift the leaf.


YG17 brings more light to the raised portion of the leaf.


Lastly, FYG2 (a newer addition to Copic's line) becomes the brightest of the greens.

YG01 finishes the effect. I run a light coat of YG01 all over the leaves to pull it all together and limit harsh lines between the colors.
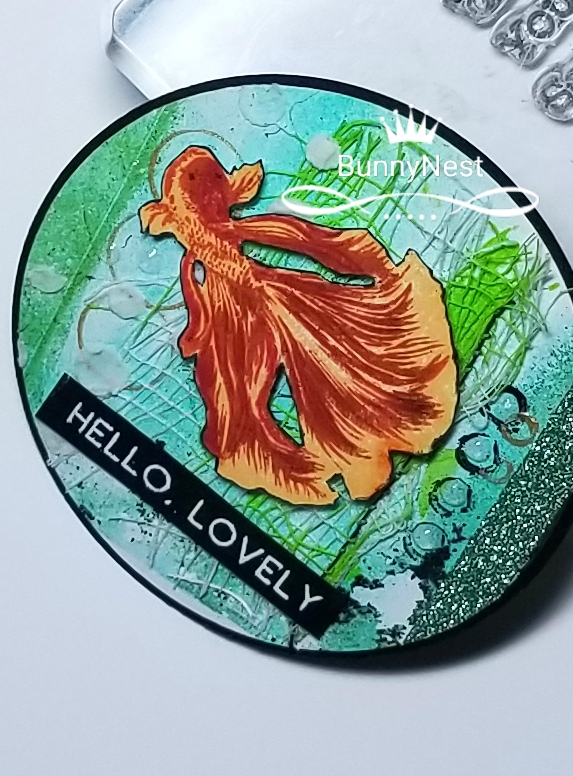
------      YELLOW      ------


Yellows can be tricky. It's such a light, bright color that deep shadows can pose a problem. Here's my palette, Y11, Y06, Y08, Y26, E37.


Are you scared? I was. I admit it. I wasn't certain this was a good idea, but hey, it's just paper, right? It's ok - it works out in the end. Note the use of the dark marker on the end of the petals - those define where the folds in the petal are. Petals are seldom flat and smooth.


I added the lightest color and learned my marker was very dry and I had no refill. Still, it did its job. I leave a white space on most of the petals where I want the very lightest effect. This is an important step. If you get nothing else out of this post, read this.
Leave yourself room for highlights. Dark areas are easy to darken. Getting lights back is nigh on impossible.

The mid-tone brings on brassiness. I pull a little of the E37 out with this Y08 application.


A little Y26 adds more definition. So that's where I left this - finished the leaves as shown above.


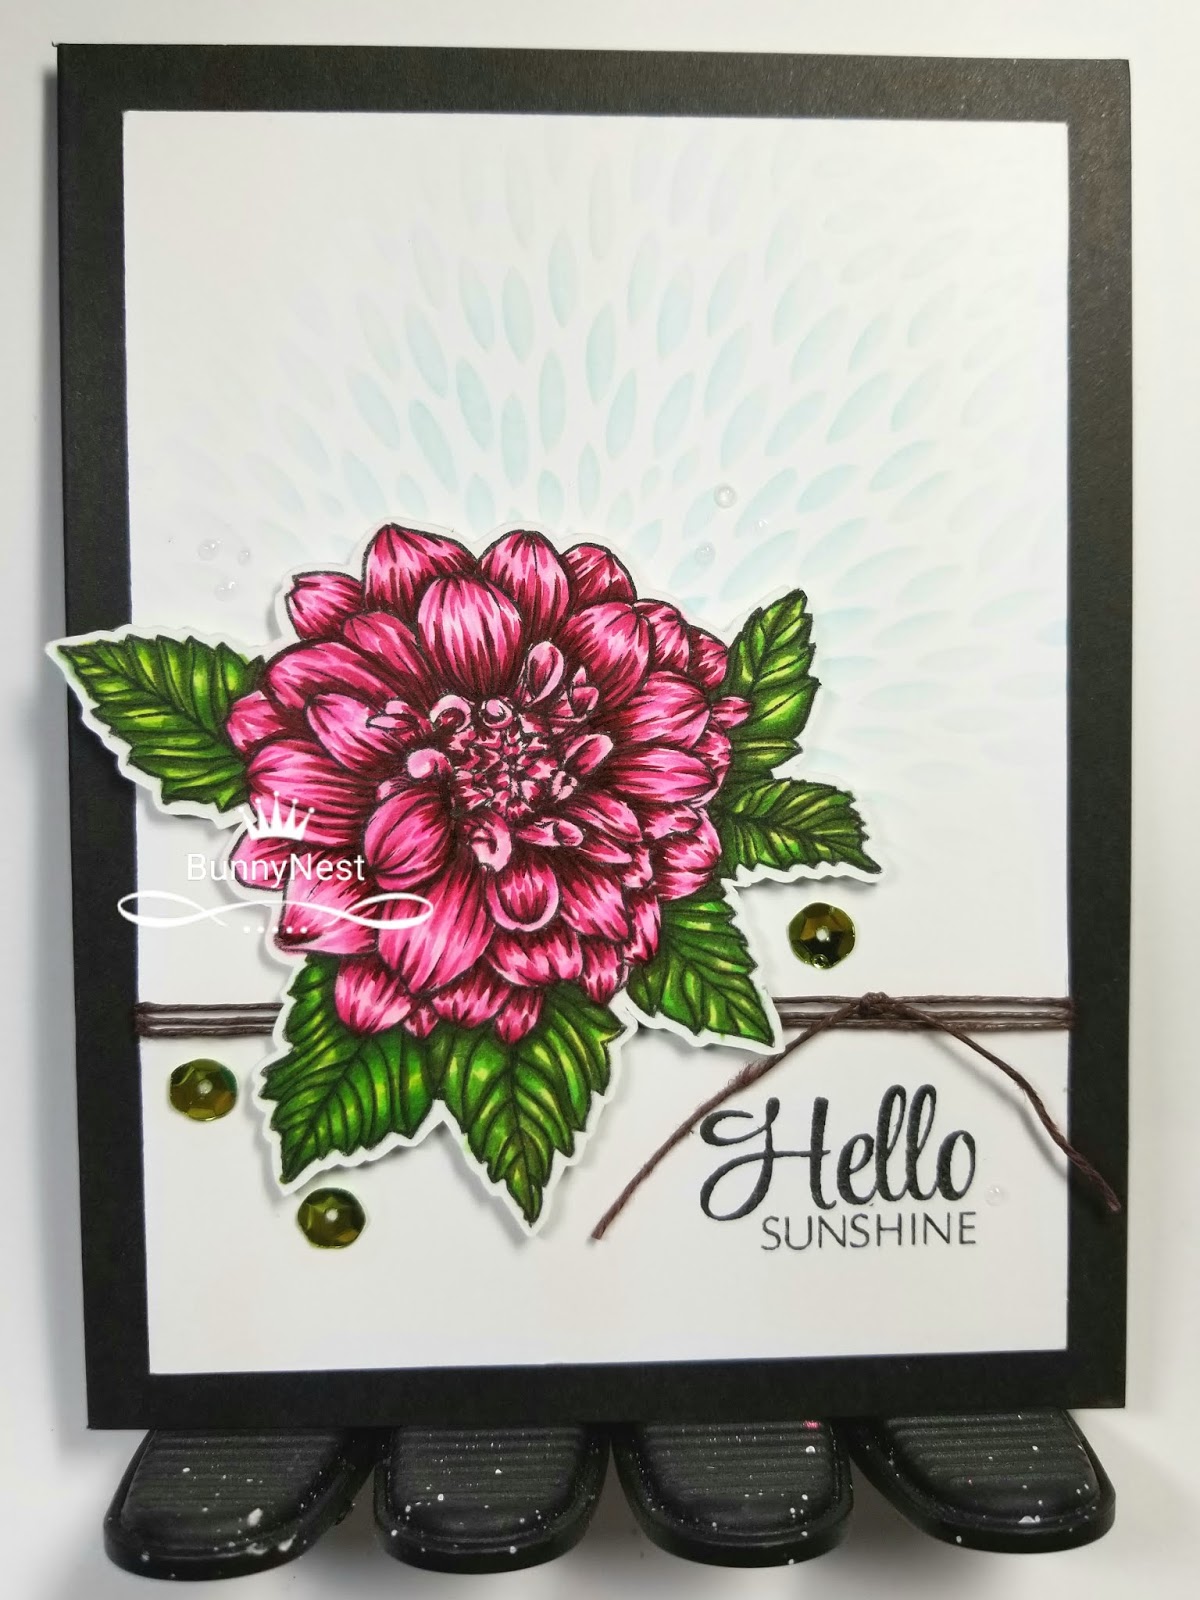
So here they all are. I used the lovely delicate petals stencil from Hero Arts with Distress Ink Tumbled Glass using Clarity Stencil Brushes. These brushes... so awesome if you want a delicate blend without any harsh lines.

Clarity Stencil Brushes


I added some twine, a sentiment from retired Verve set Rise Above, plus some Tonic sequins and Crystal Drops in Morning Dew.


Color palette RV02, RV06, RV17, RV19.


Color palette YR01, YR65, YR15, YR68, YR27, and E37.

I hope these bring you some inspiration. Pull out your favorite colors - enjoy coloring even if the final result isn't stellar. It's only paper!

Ta for now,
~ky


Thursday, July 19, 2018

Little Things

Hello! Welcome to my blog! I must tell you I have a special place in my heart for little things. Baby bunnehs, little piglets, baby alligators - and not just animals! I also love small-format works of art!

I fell in love with artist trading cards (ATCs) years ago, but somewhere I lost the desire to create them. I think I was busy falling in love with the next new thing. I moved from scrapbooking to card making, but all things old are new again!

Small formats still tell stories!
ATCs were a way to create one of a kind art. They were used to trade with other artists - sharing personal style, techniques, or serving as business cards! These were usually created in small quantities earning collection numbers (i.e. #3 of 14). Some were one-offs - only 1 in a series, thus coveted.

The latest phenom stirring the crafty waters are Artist Trading Coins (ATCoins or just Coins). These are the same principle, just abbreviated. The ATCs were 3.5 x 2.5 inches (same size as baseball trading cards and most business cards). ATCoins are 2.5 inch circles. I don't know why, but these are so addictive!


My friends and I just finished our first Coin exchange. There were 2 options - create 18 similar coins (it's hard to make them perfect copies) to exchange with 17 others, and a one-to-one exchange. So satisfying, invigorating, muse-shaking fun! I'll share those once everyone has received theirs in the swap - no spoilers!


I started with a Gel Press printed sheet and punched 2.5 inch circles. I colored some medical gauze with Daley Rowney FW light green acrylic ink. Then I embeded it by stitching it into the gel print and covering bits with modeling paste. I added circles of acrylic paint, added some green glitter washii from Tim Holtz and Nuvo crystal drops. The fish is a Beautiful Betta from The Ton. I love this set so much!!

Here's the one-on-one swap. I made this adorable undersea coin using alcohol inks and foil on Yupo paper. The stamps are Inkon3's My Little Catfish.


I put these cute little merkittehs and sea horse on a fluid alcohol ink circle of Yupo paper. Did I mention these little coins are addictive?!

Here's the one I received from my partner, Rebecca Roh. Isn't it gorgeous? Every kitteh needs toys and leaves pawprints on your heart. I love it!!


Thanks so much for stopping by. I'm hosting the Mix-Ability challenge on Splitcoast this week. Swing on by and join us!

Ta for now,
~ky

Wednesday, July 4, 2018

Wonderful Trees

Hello again, my friend! I've been working on a lot of things lately and my blog is a bit neglected. I will have more to share with you soon!

I am working toward attending JunkieFest in Minneapolis at the end of July. I'm so excited! Everyone is working hard for us, and I want to have thank you cards ready to share.

You know I'm nuts about ink blending. I really really really love it. I'm sharing a little video about how I make make multiples using this technique.  This set of eight cards used Distress Inks, but the video uses Stampin' Up! There are 2 in each color combo. Any dye-based ink can be used in this manner.


I know many crafters who are NOT fans of multiples. To me they are soothing. My little video will show you how I set things up for success. The key is making a plan and having everything set so it goes smoothly.


I hope you enjoyed this little video and post. Which color combo is your favorite? I'll be honest - I can't pick!


I'll be back soon with other news! Thanks for visiting, and I hope you enjoyed a safe and happy Independence Day!

Ta for now,
~kc


----    S U P P L I E S   ----
Rooted In Nature stamp set - SU!
MISTIs - My Sweet Petunia
Cardstock - Hammermill Premium Color Copy Cover 80 lb.
Laminator and 3 mil sheets
Ink on 3 Blackout hybrid ink
Distress and Stampin' Up! inks
  • Daffodil Delight
  • Tangerine Tango
  • Rich Razzleberry
  • Chipped Sapphire
  • Stormy Sky
  • Seedless Preserves
  • Dusty Concord
  • Aged Mahogany 
  • Mustard Seed
  • Spiced Marmalade
  • Barn Door
  • Picked Raspberry
  • Wild Honey
  • Crushed Olive
  • Peeled Paint
  • Forest Moss
  • Pine Needles
  • Evergreen Bough


Welcome to the Bunny Nest! I host rescued animals in a small in-home setting. Currently, I host 3 bunnies and 2 kitties. These animals will be socialized and housed for the entirety of their lives in my home. They inspire my crafts, and I use any proceeds to pay for their needs. Thanks for visiting!