Friday, September 19, 2014

Get Well Bunneh

Hey there - Splitcoast Stampers (SCS) has a new platinum company with the cutest images. I LOVE THEM. Lili Of The Valley, from England, has a stellar line of products, and best of all, they ship WORLDWIDE for FREE. Yes! Love love love!

This week's Mix-Abilities challenge on SCS was brought to us by Birgit (Biggan), and she asked that we make faux marble paper to go with our projects this week. I thought I'd step it out for you, so here we go:


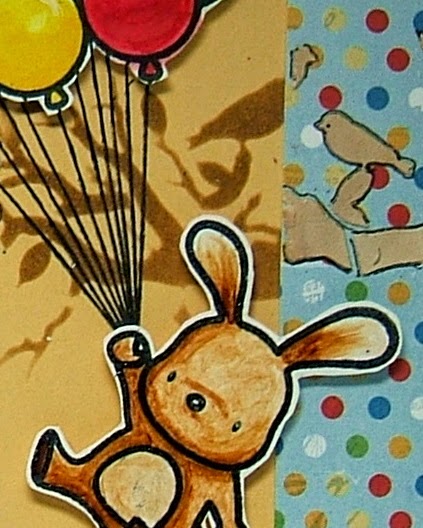
I started with rich colors and added shadows. I worked with them a bit to get nice deep shading, and to add a few features to the bunneh. You can do this for almost any image, if you haven't thought of that. It's really a nice trick!


I used a mask over the image then stamped 2 very old Stampin Up background images for the bedspread and wall. I wanted them to be similar for a cohesive feel. In the first image, there were no folds and dimples on the bedspread or pillow. I chose where they might be to make it feel like the bunneh was sitting into the bed rather than just on it. I added glossy accents to the carrot juice bottle, some Gelly Roll clear star to the spoon, and dots of white on the grapes and bottle to add dimension.


I sprayed watercolor paper (Master's Touch cold press, 140 lb) with water, then with several colors of Dylusions spray to complement my colored image. I love how it pools and spreads leaving feathered edges and puddles. Love!


Now, 140 lb watercolor paper is heavy. The technique (faux marble) requires wrinkles, but it isn't easy to get wrinkles with heavy paper. So... I peeled it apart. Many papers are laid or layered, and if you're careful and have a little patience, you can tease them apart.


Even so, I did manage to get a few little rips and tears in it. That's actually going to work in my favor because real marble has lots of defects.


 You can click on any image to see it larger.


Here it is all wrinkled up. I love this step because I can take out all my frustrations on it. Hahahaha!


I gently applied distress ink direct from the pad over the wrinkles. You only want to hit the peaks, but it's not the end of the world if you get a little in the valleys.


I went over it, just as gently, with a damp wipe. I wanted to soften the harshness of the ink just a little.


Just because every piece of marble I've fallen in love with has veins of many colors in it, I felt like this was crying out for a little white here and there. Now, Dylusions will seep into your white ink because it's a very friendly product - just like Dyan Revealey herself! In between the Distress ink and the white Memories ink, I sprayed a very light coat of clear spray. I wanted to see the white.


Another thing I love about marble are the specks all through it. I used Dylusions and some well-watered down white acrylic paint to add splatters all over the piece. I love doing this. If you get too much in one place or a big glob, you can lift it right off with a paper towel. Isn't that fun?

I put them all together for the finished card. This card is for a dear friend of mine who is recovering from knee replacement surgery. I'm sure it will lift her spirits!


That's it for me today. You should go check out Lili Of The Valley and the Mix-Abilities challenge on SCS. We have a great time exploring mixed media, and even our mistakes teach us lessons. Hope to see you there!

Ta for now,
~ky

Monday, June 30, 2014

ATC Swap!

I don't know about you, but ATCs are absolutely adorable! They present different challenges from other size projects, forcing you to concentrate the creative impact in a mere 2.5 x 3.5 inch canvas. Squee!! Couple that with using The Cat's Pajamas supplies, and it's over the top!

I have a hard time choosing simple. I wanted something different - an interactive piece that would support plenty of bling and dimension. I basically wanted to do a flip card, so this was the template I used.

This image is copyrighted by Penny Wessenauer, 2009
I wish I could take credit for the design (seriously, why didn't I think of that item #4billion), but Penny Wessenauer is the genius behind this and several other designs. If you click the photo, it will take you to a photobucket account for this design and many more.

Here's the front side of mine. I loved picking out the little pins and beads, the flowers, well, everything about it!


I had to put my scissors in there to hold it closed. The stamps are from The Cat's Pajamas set called Bubbles Happen. Here's the inside:


I also used several Cat's Pajamas dies - the cloud border, the flower is from Under My Hat and Petal Posie Cut Ups, and plus the Butterflies Cut Up. I also used the SU! Chalk Talk die for the clipboard top. I cut that out of metallic foil tape, and the butterfly and small flower from vellum.

The paper is My Mind's Eye - Summer Splash. The cardstock and Mother of Pearl paper (clouds) is from Gina K Designs. Misc fun foam, beads, bead pin, spinner, and sequin from my stash.

I hope you enjoy the description, especially Penny's template (I do not know Penny, but I want her to be clearly credited for this design!). Get out there and play!

~ky

Here are the sweet ATCs I received in return. They are all simply ADORABLE!

Left to right, Linda Nicholson, Linsey Rickett, AshJoy, Jenni, Linda Nicholson.

Left to right, Christine Veneruso,Kelli Hull, Bonnie Ratzloff, Nancy Thomas.


Monday, June 16, 2014

Cat's Pajamas New Release Blog Hop


We had an awesome release tonight. I loved everything I saw, and it was so cool. Like watching home movies on a backyard sheet/video screen and pointing at the favorite parts! Love!

Here's another project I completed, that I hope you'll enjoy.


How fun is this!? I love this summer-licious set "Life Is Like Ice Cream." You know I'm a sucker for ice cream! The long-eared bun is enjoying a cool dip in the ice cream under a fun ribbon banner with flags on the back deck. Don't tell him the grass needs mowing!

It's hard to see but this is one of the new Cutables! You can print this right onto your cardstock and patterned paper, and cut it with your paper trimmer. No fancy machines needed! But they are also available as png and cut files for your mechanical pleasure.

In total, there are 8 new sets, 3 new Cut Up dies, and 2 Cutables for you! I love that Alma is using the proceeds from this release's cutables to add to Julie Masse's adoption fund. Squee! What a great helping hand!

We had a great time with this release. Hop on over to Noelle's blog to see her awesome project! Thanks for stopping by!

Ta!
~ky


Thursday, June 12, 2014

Finding Beauty in Nature's Hello

Hi there! I have yet another sneak peek for you from the Cat's Pajamas summer release. Can I just tell you... Mwah! These sets have me absolutely purring!


This time we're introducing TWO sets! First, this stamp set featuring PJ the bear in 'Nature's Hello' and he's channeling Frank Sinatra! I love him! I used a border punch (EK Success) on two edges of cardstock, then lined them up over a rainbow of colored paper. Can you tell? He's walking on sunshine! Doing the tightrope with his flower umbrella helping him balance. I really would love to dance with PJ!


Next, we have a set that's a little different style called Simple Blooms. This is a solid graphic design and I love the many things you can do with it. Check it:


See? I love how it looks with some clear embossing, tone on tone. There are great sentiments with this set too. You can click the image to see it a little larger.

So - there you have it. Day 3 sneak peeks. Are you seeing anything you like? Wait, we have MORE! Be sure to leave a post on THIS THREAD over on Splitcoast to be eligible to be IN IT TO WIN IT! You could come away smelling like a rose. You have to be a member to post, but it's FREE and there are tons of people sharing what they love, and tutorials. Don't forget, too, that there's a color challenge and you have 2 weeks (closes June 23) to get your entry posted.

If you want even more inspiration, go over to the Cat's Pajamas Blog to see what the rest of the team made. And check out the wonderful charity of Alma at TCP creating products where the proceeds go to help Julie Masse and family with their adoption. Awesome! Thanks for stopping by!

Ta!
~ky

Wednesday, June 11, 2014

Play Ball!

Hi there! I'm here to share another project with you featuring a new Cat's Pajamas stamp set titled Play Ball. I love sports, and while I can't pick just one, baseball has been part of my heartbeat from a very young age. You see, I was the first girl in Texas to try out for the boys high school team. I was a pitcher, and I loved it! Alas, the UIL (entity that standardizes rules) ruled that I could not be awarded the position. My coach was very sympathetic and so I kept the books and stats for awhile. Aaaah summer.


I love that big-eared bunneh!! I couldn't wait to make him the star of my show. How cool is this for all those summer parties, birthday card needs, and even Project Life journal cards?


I wanted to keep this old-school, back when the uniforms were made from flannel and embellishments were limited. Most teams couldn't afford to have names stitched on the jerseys way back in the day. One team, my fave, plays in pinstripes at home, and still ascribes to the belief that you don't need your name on the jersey because you play as a team. Values!

I loved this Authentique paper because it had pinstripes, baseball diamonds (stitching), and patchwork that always accompanied our game-worn clothes. That juicy ball is big and coming right down the middle and the big-eared bun has it all sized up, so...

PLAY BALL!

Thanks for stopping by today - feel free to leave comments or questions. Don't forget to pop over to Splitcoast Stampers and comment on THIS THREAD to be entered for a chance to win the whole release! That includes 8 new stamp sets, 3 new Cut Ups dies, and 2 new Cutables! Stay tuned for more sneaks tomorrow!

Ta!
~ky


Tuesday, June 10, 2014

The Cat's Pajamas Sneak Peek week!

IT'S HERE!!!


I have been busy making the cutest things all because the owner of Cat's Pajamas (Alma) favored my project and called me the Swanky Stamper! When I heard the news, I almost fell out of my chair. What an HONOR!

So this week, and today, kicks of the sneaky peeks, and coincides with a new challenge that you can play along with us! You really should play you know. You should. *wink wink nudge nudge* You might be a Swanky Stamper!

This week we're highlighting EIGHT stamp sets in the Summer Release, 3 NEW CutUps and 2 brand new cutables. They will all be available on June 16. I'm thrilled that I get to share the fabby new stuff with YOU!

I just adore these penguins - so whimsical and fun. I love this stamp set because it's not only adorable, but it's STRANGE and WONDERFUL! This week's challenge is a color one. That's it - use these colors!


This is how mine turned out. I love it. Because it's fun, and shabby, and easy. I stamped that penguin on cardstock and color it up with my Prismacolor colored pencils, then I dressed it up with flower soft, little rhinestones, a simple flower and some sequins with seed bead centers. That wood in the background is awesome woven basket-style from May Arts.

I'm so happy to be sharing my projects with you all week, so come back and see me tomorrow!

Ta!
~ky

Friday, May 16, 2014

Good Company

Hello friends! I've been busy, and that has led to blog neglect. Oh no! I will have to pay an 'extra-post' penalty I think. Heehee! This week I'm sharing my card project for the Splitcoast Stamper's Mix-Ability challenge, and the Cat's Pajamas challenge, as well.

This week, Dina has us doing the mortise or reverse masking technique. It's really easy, but my brain tried to make it really hard.


The technique is simply to use the outer part of a stencil or shape as a mask. Dina helps by making a short video for brain-dead crafters like me. Our team made several really nice samples to get you started, too.

I started with book text that I covered in gesso. I laid down the mask, and sponge-blended distress inks to cover the panel. By the way, I now have the circular blending foams and tools by Ranger, and they really do reduce the chance of getting odd lines and stray too-dark patches over the rectangular ones. Then I cut out the mask shape for the card.

I stamped the adorable penguins using Archival ink, coloring the bike with Gelly Roll pens (red and clear star for that childhood-bike shimmer). Unfortunately it doesn't photograph well.


I added some drywall tape that I covered with green Inka Gold for a little shimmer and to tie the colors together. I love those little clear sequins, too. They are just the right amount of shimmer without overwhelming. The little pearls are from Doodlebug and I love them.


I didn't want to overdo the embellishments, and this ribbon was the perfect combo of shine and flowers, and the fishtail banners add an element of fun and the feel of the wind blowing behind the bike. Now, who could resist a pair like that?

So hop on over and check out the challenges. The Cat's Pajamas is ANYTHING GOES (YEAH!), and you have until Memorial Day (May 26th) to play. Have a beautiful weekend!

Ta!
~ky

Recipe:
Cosmo Cricket patterned paper, GKD cardstock
Distress inks, Archival black ink
The Cat's Pajamas stamps - Besties
Hobby Lobby flower ribbon
Darice sequins
Doodlebug pearls
ProArt gesso
Duck brand drywall tape
Inka Gold metallic rub paste in green/yellow
Ballpoint pen for faux stitching

Tuesday, May 6, 2014

Sparkle Kitteh

Yeah I've been a slacker. On the blog-front at least - I've been very busy on this side of the computer. Here's a little card I made recently for the Cat's Pajama's stamp company. I just love this particular release so much! 


Alma, the owner of this fantastic line of products, picked this card (and me) to be the Swanky Stamper of the month of March! THANKS ALMA! That means I'll get to share some pre-release product and sneaks with you. Squee!!

This card was so much fun. I loved stamping multiples, coloring them with Inktense pencils, then 'fussy' cutting them out. Here's your Sparkle posse! Don't know about you, but if they were gunning for me I'd run! Ok - gotta go start dinner. Hopefully things slow down just a bit so I can share more goodies. Thanks so much for stopping by!

~ky

Ingredients
My Mind's Eye Six by Six Summer Splash patterned paper
Gina K Designs Pure Luxury cardstock and ribbon
The Cat's Pajamas Flying By stamp set, cloud and grass border dies, and framed up 2 die
Spellbinder's Ribbon Tag Trio three die
Distress and Versafine Inks
Inktense ink pencils by Derwent
Foam dimensional pieces and Gelly Roll stardust pens

Tuesday, April 29, 2014

DIY Sponge Daubers

Confession: I'm addicted to Distress Inks and foam blending tools. Yep. Raising my hand, but I don't want a cure. However, I do want my wallet to not feel conformed to loving some of the supplies. Enter into my DIY mode - Making Tsukineko-esque finger sponge daubers like these:


Now, I don't own any of this style, so I'm not sure if the foam is removable, washable, and likely to hold up in my mixed-media exploratory lab of a studio. I knew I wanted to be able to replace the foam because it will inevitably get dirty, worn, or possibly be exposed to close nibbling love of a bunneh. I wanted to be able to wash them, too. I'm messy. And cheap. These precious items run over a buck per dauber. Yikes! That little bag is $6.39. 


Burdened with this knowledge and fearing disappointment, I did what many other crafters would do. I turned to Pinterest. I found this really helpful blog post from a generously sharing stamper named Sharon. I do not know Sharon, but she sounds like a very smart lady who'd be a lot of fun!


I went to Home Depot where I found this 3/4 inch, red PVC precut in 3-foot lengths for $3.50-ish. I had a bag of cosmetic sponges from forever ago, so I pulled out my compound miter saw (I LOVE THAT THING!) and started cutting. I cut each piece at 1.25 inches. I have a little hand file, and I'll smooth down the edges - but that really isn't necessary.

For each dauber, I folded the sponge in half and pressed it down into the finger guard. Just a little adjusting and it's a nice snug fit. Perfect! You can slide them further in or push them farther out - whatever you need. I like them so much I might have to keep them by my bed.

That's my little tip for today. It was $3.50 and I stopped after I cut 31 and have another foot of uncut pipe remaining. Now, you know! Go be creative!

Ta for now!

~ky


Friday, April 18, 2014

Tag, You're It

Howdy! I'm sharing a quick little project with you today. I made a tag for this week's Mix-ability challenge on SCS. Most papercrafters are 2/3rds mixed media anyway, so why haven't you played with us yet? Heehee! This week, Anna challenged us to use sprays, mists, splashes or splatters on our work.


I have fallen head over heels in love with this stamp set (Up and Away) by Mama Elephant. They have matching dies that cut beautifully, and I love those, too. However, I didn't want a white border, so I fussy-cut these. I colored them with my Stampin' Up! waterbased markers.


I sponged Distress Ink in layers using scraps from a previously cut grass border (The Cat's Pajamas), torn paper, and the cloud border (The Cat's Pajamas) to get a sunset effect. I splattered water over the distress ink because I just love the texture it adds.

I used Mama Elephant's confetti die cutting stars and hearts out of gold metallic paper. I popped the balloons up on foam for added dimension, and applied gold embossing paste along the edges to frame everything. I used 2 strands of organdy ribbon for the tag topper, and hit it with the heat gun to melt and curl the ribbon in random areas.


This is my guard bunneh, Tinker, who protects my creative time at the studio. I just love those velvety soft ears. Thanks so much for stopping by - I know you're busy and appreciate you taking time out to visit. That makes me happy!

Ta for now,

~ky

Thursday, April 10, 2014

Spring Zephyr

One of my favorite parts of Winnie the Pooh was the windstorm he and Piglet were caught up in. Rather than it being Winds-day, Owl explained it was just a mere spring zephyr. Today was very much like that, except it was Thursday, and there was no Piglet, Pooh or Owl. Just this adorable bunneh who came to play with me today.


Isn't he stinking cute!?! I colored him a bit coarsely to give him a rustic and battered appearance - kind of like how I feel fighting the wind all day. Our theme this week for the Mix-abilities challenge is spring/Easter themed. Definitely reflective of our spring weather! You should come play - it's easy!


He's got a whole party of balloons whisking him off through the trees, well above the grass, and almost into the clouds. I think I could write a while story from this card! Let me tell you some of the details.

I split the patterned paper to give a hint of going out a window. I sponged distress ink through a stencil so the yellow panel has part of the branch showing. I tinted some modeling paste with the same ink, and pressed it through the stencil over the patterned paper, then outlined it so it would stand out a little.

I cut the grass from GKD cardstock, and the clouds from Mother of Pearl cardstock, also by Gina K. It's so shimmery and perfect in real life. I colored the images with my Copic markers, and added little highlights on the balloons with white acrylic paint. The sentiment is from the same Mama Elephant set (Up and Away), and I die cut the banner using my SU! flip card kit. The balloons and bunneh are popped up with foam.

By the way, there's a fun challenge over on the Mama Elephant blog that you should check out. Prize is a spot on the design team. Squeee!!

AAANNNDDD I forgot to mention I'm also playing the CCEE Stampers challenge to use a bunneh or an egg or both. Fun challenge!

So that's how this day went, and how this card came about. I'm so glad you stopped by today. I know you're busy, and I really appreciate your time. Have a great day!

Ta for now,
~ky


Saturday, March 29, 2014

Happy Watercolor

Hello peeps! Hoping for spring? I hear it's coming. I think it's time to give old man winter the boot! Here's a cheery card to light your day. I know there's lots of rain out there.


This is one of the fabby new stamp sets by Stampin' Up! called Happy Watercolor. It makes it easy to look artistic. I am in love with sequins right now. They make me happy. Hope you have a great day and thanks for stopping by.

~ky

Ingredients:
Cardstock, Gina K Designs Pure Luxury
Inks: Distress and Versafine
Misc rhinestones and sequins
Making Memories ribbon

Monday, March 3, 2014

Lovefest ends tonight!

Howdy friends! Lovefest has been going on over at Splitcoast, but I've been too busy to play all the challenges. I did, however, manage this one and a couple more. 


It's a Happy Hopper from House Mouse and I just adore every image of theirs that I own. This one is no exception. I went fairly simple with the design because I wanted the image to have center stage. I hope you'll get inspired to play, or at least let this card comfort you on this Monday!

Thanks for stopping by!

~ky

Ingredients:
House Mouse stamped in Memento
Colored with Prismacolor pencils and gamsol
Happy Watercolor SU! sentiment
Twinery twine
Basic Grey Whiskers and Max patterned paper
SU! Banner punch
Misc brads, GKD cardstock

Wednesday, February 19, 2014

Midweek Throwdown at OWH

Hey y'all - I'm here for a chance to plug my FAVORITE card service - Operation Write Home. If you're not familiar with them, they coordinate getting hand-crafted greeting cards to our overseas service members who don't have the luxury of a store to buy cards to send home to their family. It's pretty awesome! I'm thrilled to be featured in the Midweek Throwdown!

Here's my card. I love making little scenes and this stamp set is from Gina K Designs using Nina Brackett's Special Fathers stamp set. I created the sky and water using Theresa Momber's amazing sponging tutorials, and colored the rest with Copic markers. The papers are from Authentique's Genuine collection, a few white brads, and Gina K's awesome Pure Luxury cardstock. The fabric ribbon is a piece from my stash.

I hope you'll take a minute to explore the OWH blog - there are so many ways to be involved even if you're not a crafter. Thanks for taking a moment to stop by today - I love having you here!

Ta for now,

~ky

Thursday, January 23, 2014

Eskimo Kisses

Hey all - I'm here with a little project I did awhile back for Virtual Stamp Night. This is the card I sent my son for Christmas. Did I mention I love that kid? Yeah. I kinda do.


I love making shaker cards, and hadn't done one in quite awhile so it was double-fun for me. I put crushed artisan glass and glass beads int he window. I love that color combo! We are forecast to get a little snow today, so I thought this was a great card to share. I hope I'll get into the studio again sometime soon. I really need some art therapy. Thanks for stopping by today, and leave me a comment if you have a minute.

Ta for now,

~ky

Supplies:

Cardstock - Gina K Designs
Patterned paper - Basic Grey Eskimo Kisses
Stamps - SU! Truly Grateful; GKD Season's Greetings
Embossing powder - SU! Sky Blue, Stampendous Winter Wonderland
Spellbinder's Lotus die
American Crafts ribbon, GKD buttons, misc twine

Sunday, January 5, 2014

Tis the Season

to make Valentine's cards! Yep. For the OWH calendar the end of the year is 2 months into the new. Actually, the deadline has passed, but I thought you might like to see them. I actually used some washi tape. Wow. Go me! This tape is Hobby Lobby's Paper Studio line (the 2 black and white strips), and they stick better than other washi tapes I've used. I understand the addiction, but I would rather spend my money on other things. The red is paper from SU! Very old paper, I might add. Like, 2008. Eep!


The stamps are Lovely Ladybug from Gina K Designs illustrated by Beth Silaika, and I added a little rhinestone to the center of the red circles. Easy and adorbz!

I also made several Easter cards, but I'll save those for a later post. Go make something!

~ky
Welcome to the Bunny Nest! I host rescued animals in a small in-home setting. Currently, I host 3 bunnies and 2 kitties. These animals will be socialized and housed for the entirety of their lives in my home. They inspire my crafts, and I use any proceeds to pay for their needs. Thanks for visiting!