Tuesday, April 29, 2014

DIY Sponge Daubers

Confession: I'm addicted to Distress Inks and foam blending tools. Yep. Raising my hand, but I don't want a cure. However, I do want my wallet to not feel conformed to loving some of the supplies. Enter into my DIY mode - Making Tsukineko-esque finger sponge daubers like these:


Now, I don't own any of this style, so I'm not sure if the foam is removable, washable, and likely to hold up in my mixed-media exploratory lab of a studio. I knew I wanted to be able to replace the foam because it will inevitably get dirty, worn, or possibly be exposed to close nibbling love of a bunneh. I wanted to be able to wash them, too. I'm messy. And cheap. These precious items run over a buck per dauber. Yikes! That little bag is $6.39. 


Burdened with this knowledge and fearing disappointment, I did what many other crafters would do. I turned to Pinterest. I found this really helpful blog post from a generously sharing stamper named Sharon. I do not know Sharon, but she sounds like a very smart lady who'd be a lot of fun!


I went to Home Depot where I found this 3/4 inch, red PVC precut in 3-foot lengths for $3.50-ish. I had a bag of cosmetic sponges from forever ago, so I pulled out my compound miter saw (I LOVE THAT THING!) and started cutting. I cut each piece at 1.25 inches. I have a little hand file, and I'll smooth down the edges - but that really isn't necessary.

For each dauber, I folded the sponge in half and pressed it down into the finger guard. Just a little adjusting and it's a nice snug fit. Perfect! You can slide them further in or push them farther out - whatever you need. I like them so much I might have to keep them by my bed.

That's my little tip for today. It was $3.50 and I stopped after I cut 31 and have another foot of uncut pipe remaining. Now, you know! Go be creative!

Ta for now!

~ky


Friday, April 18, 2014

Tag, You're It

Howdy! I'm sharing a quick little project with you today. I made a tag for this week's Mix-ability challenge on SCS. Most papercrafters are 2/3rds mixed media anyway, so why haven't you played with us yet? Heehee! This week, Anna challenged us to use sprays, mists, splashes or splatters on our work.


I have fallen head over heels in love with this stamp set (Up and Away) by Mama Elephant. They have matching dies that cut beautifully, and I love those, too. However, I didn't want a white border, so I fussy-cut these. I colored them with my Stampin' Up! waterbased markers.


I sponged Distress Ink in layers using scraps from a previously cut grass border (The Cat's Pajamas), torn paper, and the cloud border (The Cat's Pajamas) to get a sunset effect. I splattered water over the distress ink because I just love the texture it adds.

I used Mama Elephant's confetti die cutting stars and hearts out of gold metallic paper. I popped the balloons up on foam for added dimension, and applied gold embossing paste along the edges to frame everything. I used 2 strands of organdy ribbon for the tag topper, and hit it with the heat gun to melt and curl the ribbon in random areas.


This is my guard bunneh, Tinker, who protects my creative time at the studio. I just love those velvety soft ears. Thanks so much for stopping by - I know you're busy and appreciate you taking time out to visit. That makes me happy!

Ta for now,

~ky

Thursday, April 10, 2014

Spring Zephyr

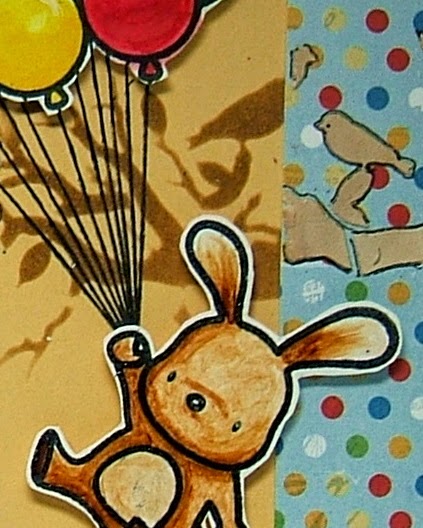
One of my favorite parts of Winnie the Pooh was the windstorm he and Piglet were caught up in. Rather than it being Winds-day, Owl explained it was just a mere spring zephyr. Today was very much like that, except it was Thursday, and there was no Piglet, Pooh or Owl. Just this adorable bunneh who came to play with me today.


Isn't he stinking cute!?! I colored him a bit coarsely to give him a rustic and battered appearance - kind of like how I feel fighting the wind all day. Our theme this week for the Mix-abilities challenge is spring/Easter themed. Definitely reflective of our spring weather! You should come play - it's easy!


He's got a whole party of balloons whisking him off through the trees, well above the grass, and almost into the clouds. I think I could write a while story from this card! Let me tell you some of the details.

I split the patterned paper to give a hint of going out a window. I sponged distress ink through a stencil so the yellow panel has part of the branch showing. I tinted some modeling paste with the same ink, and pressed it through the stencil over the patterned paper, then outlined it so it would stand out a little.

I cut the grass from GKD cardstock, and the clouds from Mother of Pearl cardstock, also by Gina K. It's so shimmery and perfect in real life. I colored the images with my Copic markers, and added little highlights on the balloons with white acrylic paint. The sentiment is from the same Mama Elephant set (Up and Away), and I die cut the banner using my SU! flip card kit. The balloons and bunneh are popped up with foam.

By the way, there's a fun challenge over on the Mama Elephant blog that you should check out. Prize is a spot on the design team. Squeee!!

AAANNNDDD I forgot to mention I'm also playing the CCEE Stampers challenge to use a bunneh or an egg or both. Fun challenge!

So that's how this day went, and how this card came about. I'm so glad you stopped by today. I know you're busy, and I really appreciate your time. Have a great day!

Ta for now,
~ky


Welcome to the Bunny Nest! I host rescued animals in a small in-home setting. Currently, I host 3 bunnies and 2 kitties. These animals will be socialized and housed for the entirety of their lives in my home. They inspire my crafts, and I use any proceeds to pay for their needs. Thanks for visiting!